📖 Using Git
Description
Git is a powerful version control system used by developers to manage changes to code over time. Whether you're working on a personal project or collaborating with a team, Git helps track changes, revert mistakes, and maintain an organized development workflow.
Getting Started
Git organizes your work into repositories, allowing you to save versions of your project as it evolves. This involves three key steps:
- Modified
- Files have been edited but are not yet tracked by Git.
- Staged
- Changes are marked for inclusion in the next commit.
- Committed
- Changes are saved to the repository as a new version.
Git is tightly integrated with VS Code, offering an intuitive GUI for managing your projects. Alternatively, you can use Git Bash for command-line interaction.
Create a Git Repository
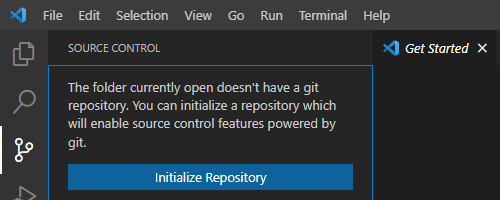
Using VS Code
- Open a folder in VS Code where your project files are stored.
- Click the
Source Controlicon in the left-hand toolbar. - Click
Initialize Repositoryto create a new repository in the selected folder. - Press
Ctrl+Enterto create an initial commit with a required commit message, such as "init commit." - Git is now tracking your project files.
Using Git Bash
- Open your project folder in VS Code and launch the terminal (
Ctrl+`). - Run the following commands:
git initgit add .git commit -m "init commit" - Git will now track all files in the repository.
Note: The first commit skips the staging step for simplicity. Future commits allow more granular control over what changes to include.
Managing Content Changes
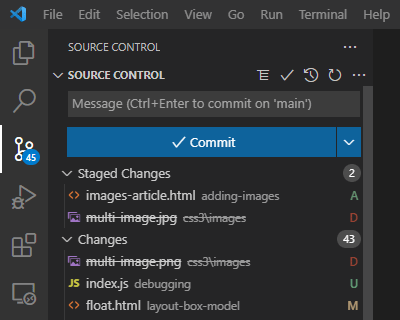
Using VS Code
To manage changes to your project content, Git needs you to initiate the tracking. You do this through a process of staging and committing changes. Git monitors your project for changes and can tell if a file is new (untracked) or modified. It won't save the changes to the version control system until you stage and/or commit the changes.
- Click the
Source Controlicon in the VS Code toolbar. - Files with changes will appear under
Changes, marked with:Ufor untracked filesMfor modified filesDfor deleted files
- Hover over a file and click the
+icon to stage it. - Write a descriptive commit message and click
Committo save the changes.
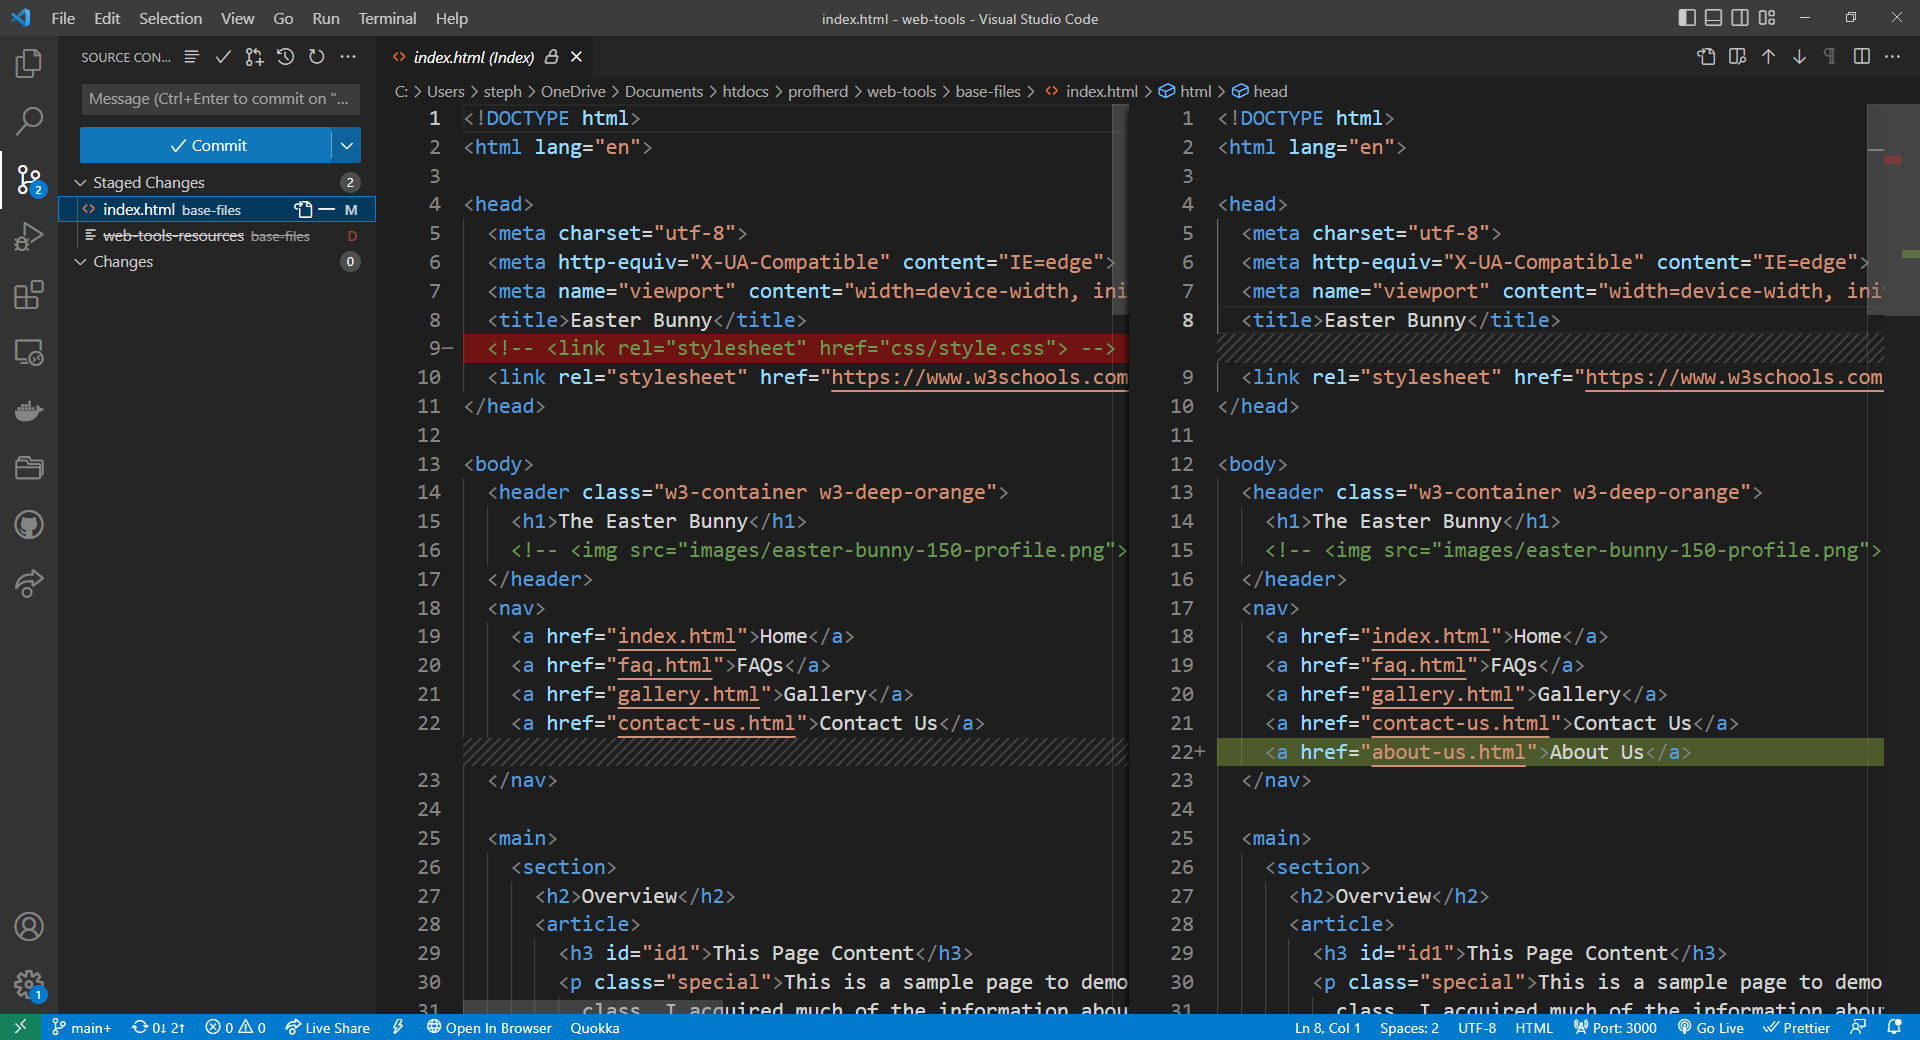
Reviewing File Changes
In VS Code, you can preview changes by clicking on a file in the Changes list. A side-by-side view will display the old content (highlighted in red) and the new content (highlighted in green). This feature helps ensure accuracy before committing.
Creating a README File
A README.md file is a key part of any professional project. It helps explain what your project is, how it's organized, and who created it. In this course, you'll include a README in every GitHub repo to build strong documentation habits.
In your README.md, be sure to include:
- Project Overview: What the project is and what it's trying to accomplish
- Author Info: Your name or class avatar
- Repository Contents: A brief description of what files or folders are included
- AI or Source Acknowledgment: If you used AI tools or Wikipedia to support your work, say so briefly and transparently
To create your README.md, open your project folder in VS Code, right-click inside the file list, and choose New File. Name it exactly README.md (all caps, no spaces). Save it in the root of your project folder — alongside your index.html file — so it's included when you push your work to GitHub.
If you're new to Markdown syntax (used in README files), check out this helpful reference: Markdown Guide: Basic Syntax
💡 Tip: A strong README helps tell your project's story. Make it clear, friendly, and informative — especially if you're building a public portfolio.
Command Line Interface
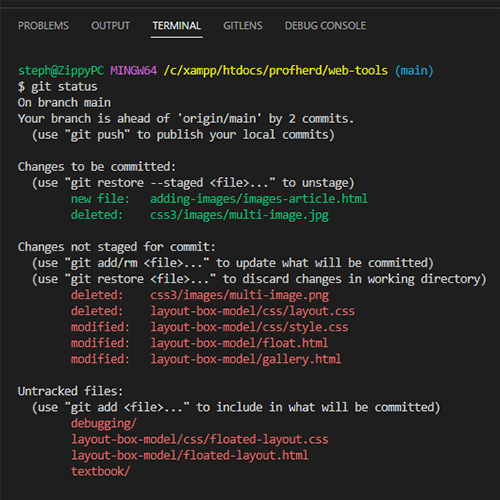
While VS Code provides a GUI, learning Git's CLI commands can be invaluable for understanding its core operations. Here are some commonly used commands:
- Check Git Status
git status- Stage Files
git add [file]orgit add .- Commit Changes
git commit -m "message"- View Log
git log
Cheat Sheets
Mastering Git takes time, but cheat sheets can help streamline the learning process. Explore these resources:
Last updated: August 13, 2025 at 3:19 PM