📖 Using phpMyAdmin
Core Tasks for This Class
- Accessing and logging in to phpMyAdmin
- Creating tables
- Inserting records
- Selecting records
- Updating records
- Deleting records
phpMyAdmin is a web-based application used to access MySQL databases for development of database-driven web sites. It is installed by your hosting company and all that is needed to begin using it is valid credentials to a database schema.
I will create a database schema for each student that needs one. If you are in the PHP class, you will get one. If you get to this point and still do not have a database schema, please contact your instructor and ask them to create an account.
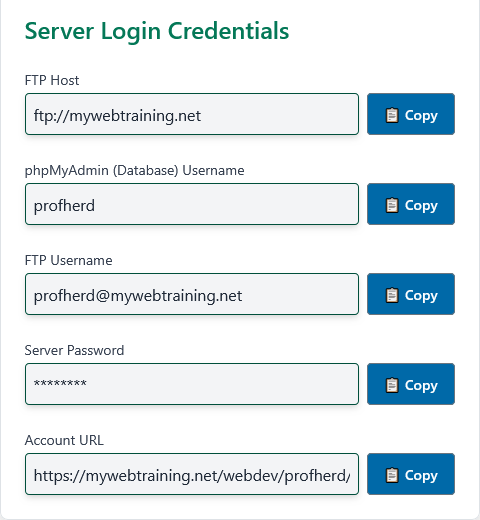
About Your Database Account
Use the server credentials assigned to you for accessing your server account (username and password) to access your databases. The same credentials assigned to you in your user profile are used for your database credentials. There may also be a community database available for use in specific classes. If you need access to that database, you will be provided those credentials separately.
phpMyAdmin App
phpMyAdmin is a development tool — not part of your final web site. It's incredibly helpful for testing your database access credentials, developing working queries, and confirming whether your SQL scripts behave as expected.

Accessing Your Databases
To access your databases, open phpMyAdmin on the class server. Go to https://mywebtraining.net/webdev/phpmyadmin/. On the phpMyAdmin login screen, enter your username and password as assigned in your student profile. If you experience login issues, verify your credentials or contact your instructor.
Once logged in, you will see your databases listed on the left. Your default database will typically share your username. Click your database name to open the tables list. Most likely, it will be empty — that's expected. You will create tables as part of your assignments.
phpMyAdmin Help
You can visit SiteGround tutorials for information about phpMyAdmin for some great tutorials. You can also get help by visiting the phpMyAdmin forum at StackOverflow. This may be more information than you need to complete your assignments. If you haven't taken a database class, it might still be confusing, but we will work through the essentials together.
Creating Database Tables
Tables are core to how relational databases work. They store all the information your app will use and manage. You create a table by running a CREATE TABLE query that specifies the column names, data types, and other constraints.
Membership Table
The following example creates a membership table with common user fields. The id column is auto-incremented to ensure a unique primary key for each user.
CREATE TABLE IF NOT EXISTS `membership` (
  `id` int(11) NOT NULL AUTO_INCREMENT,
  `firstname` varchar(75) NOT NULL,
  `lastname` varchar(75) NOT NULL,
  `username` varchar(75) NOT NULL,
  `email` varchar(75) NOT NULL,
  `password` varchar(255) NOT NULL,
  `image` varchar(75) NULL,
  PRIMARY KEY (`id`)
);
To use this script: open phpMyAdmin, click your database, go to the SQL tab, paste in the script above, and click Go.
Insert Membership Records
Once your table is created, you can begin inserting data using the INSERT command. Here's one method using DEFAULT to let MySQL auto-generate the primary key value:
INSERT INTO `membership` (`id`, `firstname`, `lastname`, `username`, `email`, `password`, `image`)
VALUES (DEFAULT,'Stephen','Herd','sherd','sherd@dcccd.edu','12345', DEFAULT);
You can also insert multiple records at once. Here's an example:
INSERT INTO `membership` VALUES
(1,'Stephen','Herd','sherd','sherd@dcccd.edu','12345', DEFAULT),
(2,'Santa','Claus','sclaus','sc@npole.com','snowball', DEFAULT),
(3,'Easter','Bunny','ebunny','ebunny@fluffy.com','eggs', DEFAULT);
💡 Tip: When using literal values for primary keys (like 1, 2, 3), be sure they do not conflict with existing records. If you see an error like #1062 - Duplicate entry '1' for key 'PRIMARY', it means you already have a record using that ID. To fix it, delete the existing entries or use DEFAULT for the auto-increment column.
Using a Backup Script
You can also import a backup script that sets up the table, structure, and records all at once. This is helpful if you need to recreate a database or restore a saved version. Below is an example that includes additional settings and comments generated by phpMyAdmin.
💡 Pro Tip: In production environments, always maintain a regular database backup routine. Backups can only restore the data saved at the time of backup — any additions or changes made afterward will be lost.
Example
-- phpMyAdmin SQL Dump
-- version 5.0.2
-- https://www.phpmyadmin.net/
--
-- Host: localhost:3306
-- Generation Time: Aug 13, 2020 at 10:01 PM
-- Server version: 10.4.12-MariaDB-1:10.4.12+maria~bionic-log
-- PHP Version: 7.2.24-0ubuntu0.18.04.6

SET SQL_MODE = "NO_AUTO_VALUE_ON_ZERO";
START TRANSACTION;
SET time_zone = "+00:00";


/*!40101 SET @OLD_CHARACTER_SET_CLIENT=@@CHARACTER_SET_CLIENT */;
/*!40101 SET @OLD_CHARACTER_SET_RESULTS=@@CHARACTER_SET_RESULTS */;
/*!40101 SET @OLD_COLLATION_CONNECTION=@@COLLATION_CONNECTION */;
/*!40101 SET NAMES utf8mb4 */;

--
-- Database: `username`
--

-- --------------------------------------------------------

--
-- Table structure for table `membership`
--

DROP TABLE IF EXISTS `membership`;
CREATE TABLE IF NOT EXISTS `membership` (
  `id` int(11) NOT NULL AUTO_INCREMENT,
  `firstname` varchar(75) NOT NULL,
  `lastname` varchar(75) NOT NULL,
  `username` varchar(75) NOT NULL,
  `email` varchar(75) NOT NULL,
  `password` varchar(255) NOT NULL,
  `image` varchar(75) NULL,
  PRIMARY KEY (`id`)
) ENGINE=InnoDB DEFAULT CHARSET=utf8 COMMENT='Used as base table in ITSE 1406 - PHP class';
COMMIT;

LOCK TABLES `membership` WRITE;
/*!40000 ALTER TABLE `membership` DISABLE KEYS */;
INSERT INTO `membership` VALUES
(1,'Stephen','Herd','sherd','sherd@dcccd.edu','12345', DEFAULT),
(2,'Santa','Claus','sclaus','sc@npole.com','snowball', DEFAULT),
(3,'Easter','Bunny','ebunny','ebunny@fluffy.com','eggs', DEFAULT);

/*!40000 ALTER TABLE `membership` ENABLE KEYS */;
UNLOCK TABLES;

/*!40101 SET CHARACTER_SET_CLIENT=@OLD_CHARACTER_SET_CLIENT */;
/*!40101 SET CHARACTER_SET_RESULTS=@OLD_CHARACTER_SET_RESULTS */;
/*!40101 SET COLLATION_CONNECTION=@OLD_COLLATION_CONNECTION */;
MySQL Dump Scripts
This is a real example of a MySQL dump script generated by phpMyAdmin. It includes the structure and sample records for the membership table. These scripts are helpful for restoring a known setup or sharing starter data with your classmates.
⚠️ Important: This script begins by dropping (deleting) the existing membership table — if one exists — and replaces it with a new version. That means any changes or additional records you've made will be lost when this script is run. Use dump scripts with caution and always check for anything you might need to back up first.
To use this script: save it as membership.sql, open phpMyAdmin, select your database, go to the Import tab, and upload your file. If successful, phpMyAdmin will confirm the new table has been created and populated with records. You're now ready to build PHP scripts that interact with it.
Last updated: August 5, 2025 at 11:29 PM